Dear Lissy,
Transitioning from a pattern and fabric to pieces ready to sew is a fairly simple process. This skill is easiest to learn when you see it, though. This method is one I discovered on Candy Goff's quilting site years and years ago. It's worked very well for me, so I'm passing it on to you.
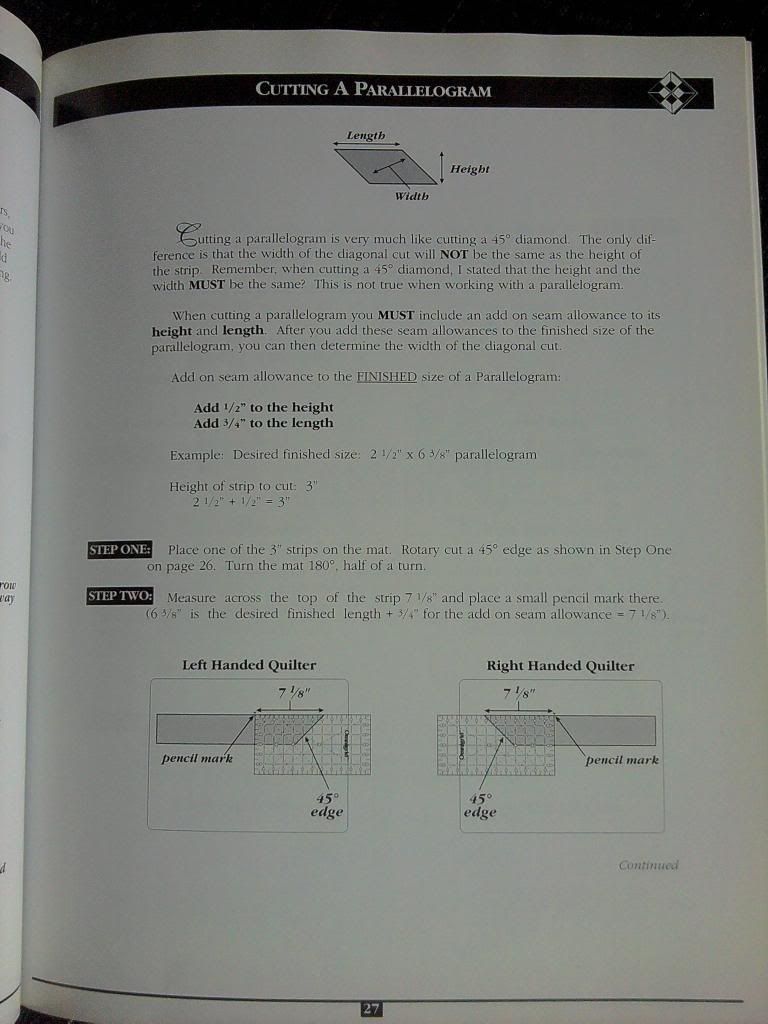 |
| Rotary cutting is the fastest and easiest way to prepare pieces. RC requires special equipment and skills, however. I recommend buying a good resource like Nancy Johnson Srebo's, Measure The Possibilities. Even if you rotary cut, you still need templates! | | | | | | |
 |
| Pre-made template patterns are common if you choose a block from a book or magazine. If you draft your own template patterns, remember to include both a sewing and a cutting line. | |
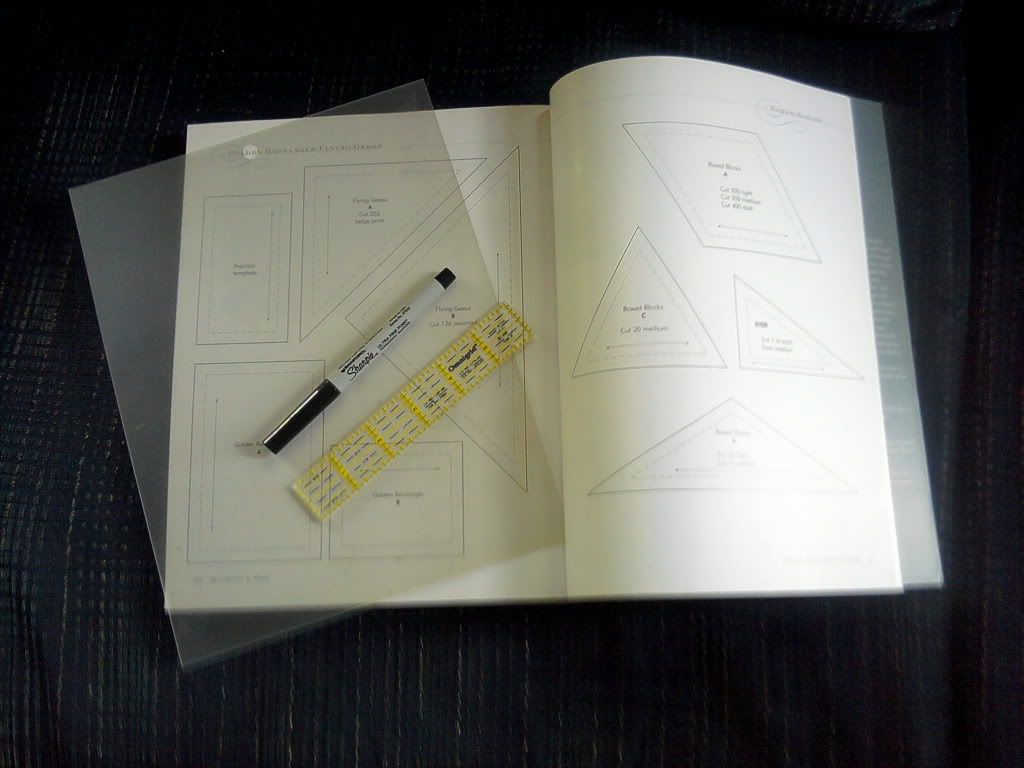 |
| To make a pattern into a template, you need heavy template material (shrinky dink plastic is ideal), an extra-fine point Sharpie, and a straightedge. Lay the template material over the pattern, and make tiny dots at the corners of the piece. Place the template material on a flat surface, and connect the dots using the straightedge. Lay the template back over the pattern to double-check accuracy. | |
 |
| Now carefully add dots at the corners of the sewing line, and along the sewing line if desired. These dots, not the edge of the fabric, provide accuracy when hand piecing. Label the template with the name of the pattern and the name of the piece (usually a letter). Finally, add the grain line. | |
 |
| Using a razor knife, mat, and straight edge or precision craft scissors carefully cut out the templates. Double check the finished template by overlaying it on the paper pattern. | |
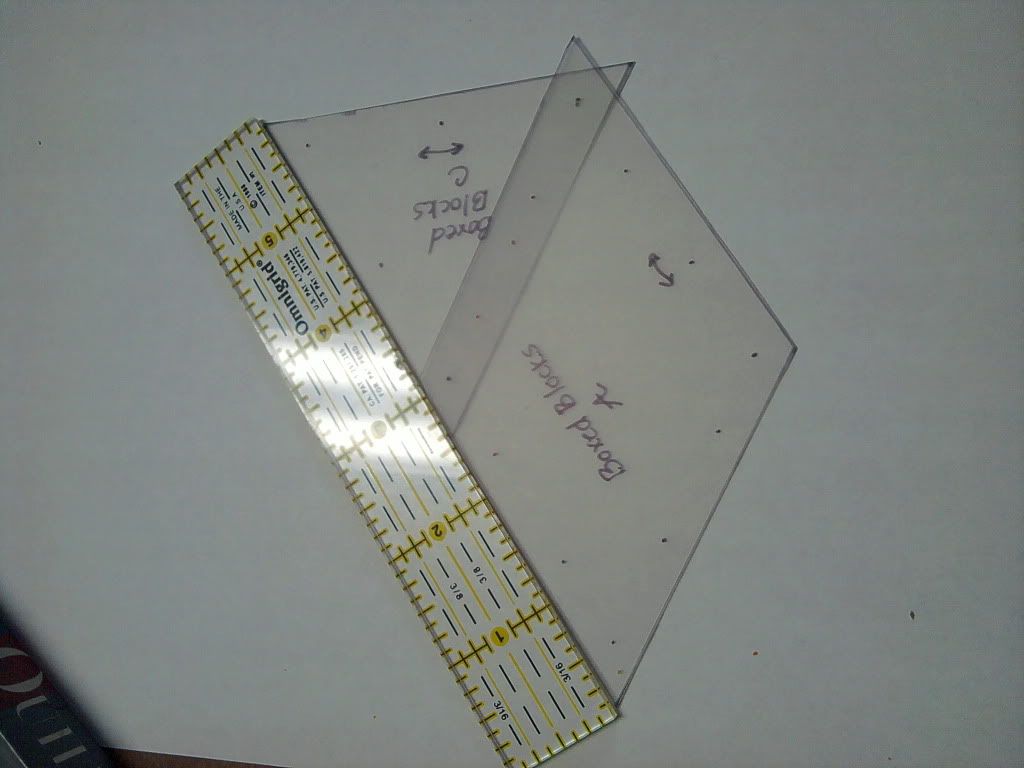 |
| If two pieces need to match, overlay the templates and make sure the match points are exactly lined up. See how they're a little bit off at the top? I'll make a new match point with a different color Sharpie. We need pin-point accuracy here. |
 |
| Use an ice pick or awl to drill holes for the match points and sewing lines. | |
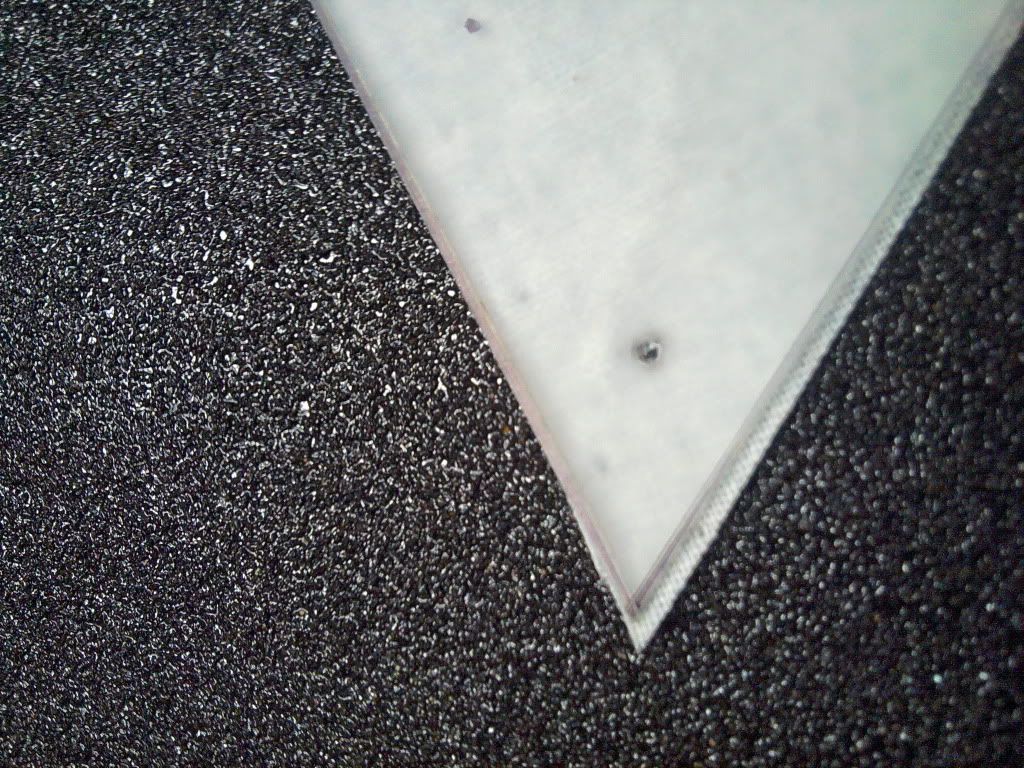 |
| Use the completed template to overlay rotary cut pieces and mark the match points. Don't worry if the cut edge doesn't line up exactly with the template as shown above. The dots, not the cut edge, provide the accuracy with this method of hand piecing. | | |
 |
| To prepare a piece directly from the template you will need your template, fabric, a pencil, tailor's chalk (optional) and scissors. This process is easiest on a sandboard, but any rough-ish surface will work. | | |
 |
| Place the fabric wrong side up, and align the grain with the arrows on the template. Mark around the outside of the template with chalk or pencil, and then carefully mark the dots with pencil. Very dark fabric requires a light colored pencil. It often makes a nice effect to center a motif like I have above. On this piece, I wanted the tip just a little bit lighter than the rest of the piece. This is called "fussy cutting." | |
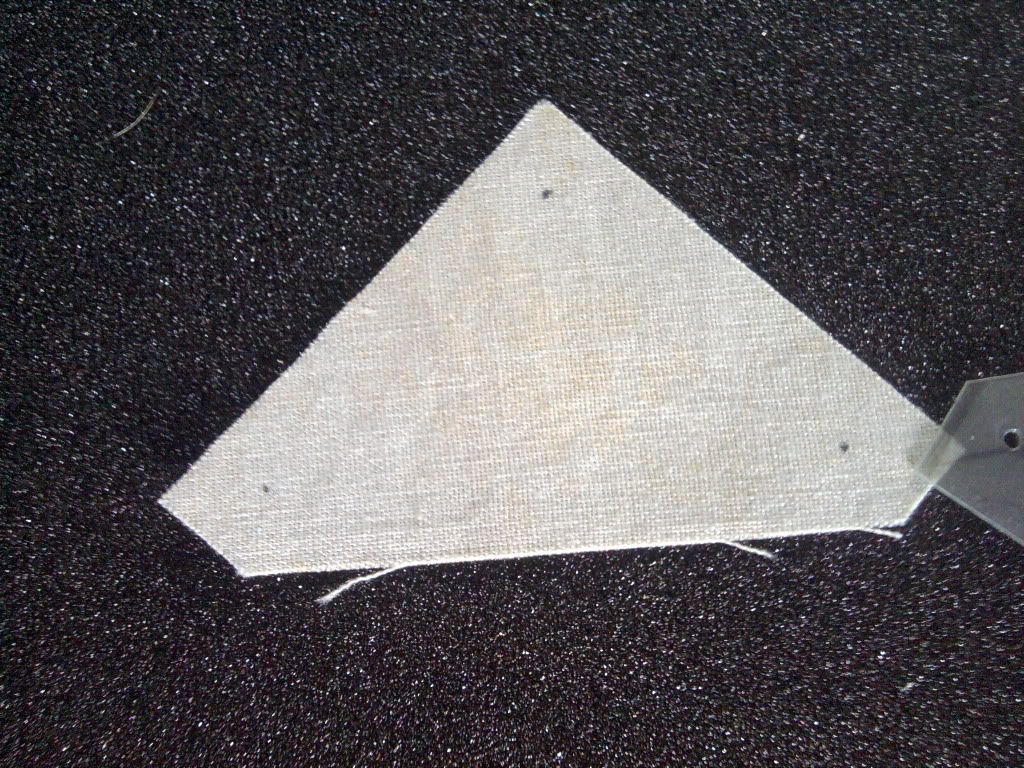 |
| Cut out the piece just inside the chalk or pencil line. Mark the match points using the holes you drilled in the template earlier. Don't mark the sewing line yet -- we'll be doing that as we go. |
 |
| Store your pre-cut, dotted pieces in a clean, dry, organized fashion. I usually cut 3-5 blocks worth of pieces at a time. This is a placemat into which I've sewn several Ziploc bags. I often store pre-threaded needles and a couple of pins inside the front cover, and a thimble and thread snips in one of the pockets. | |
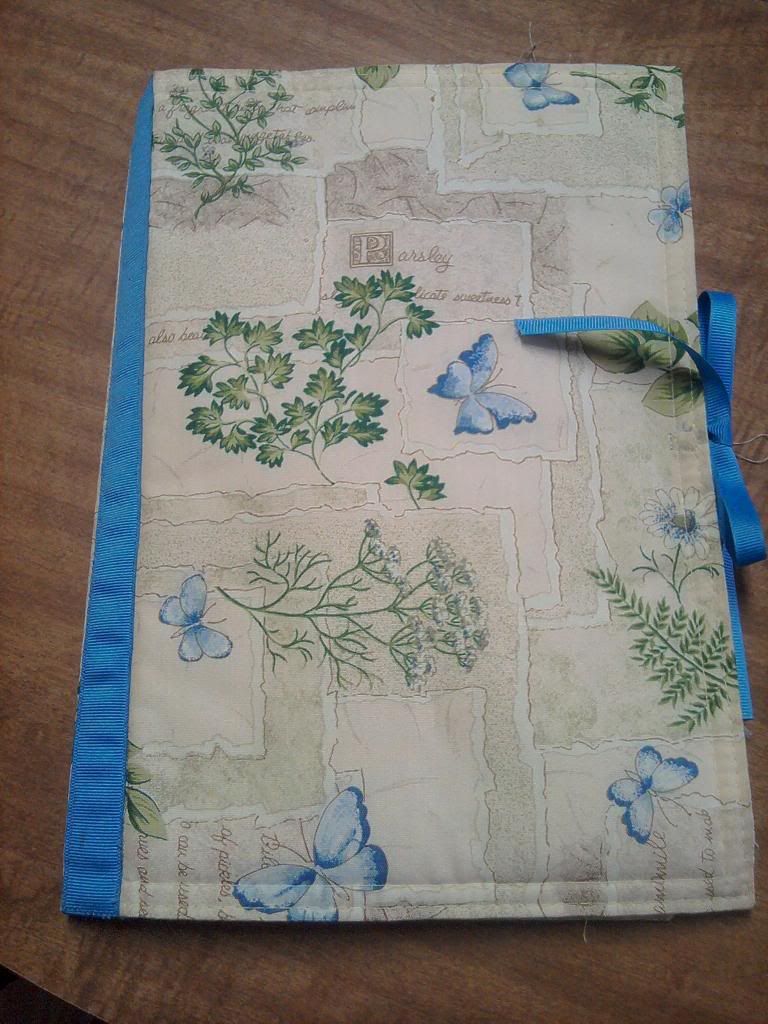 |
| Tied shut, this simple carrier is only as thick as the grosgrain ribbon I used to hide the seams. It slides easily into my project bag. | |
|
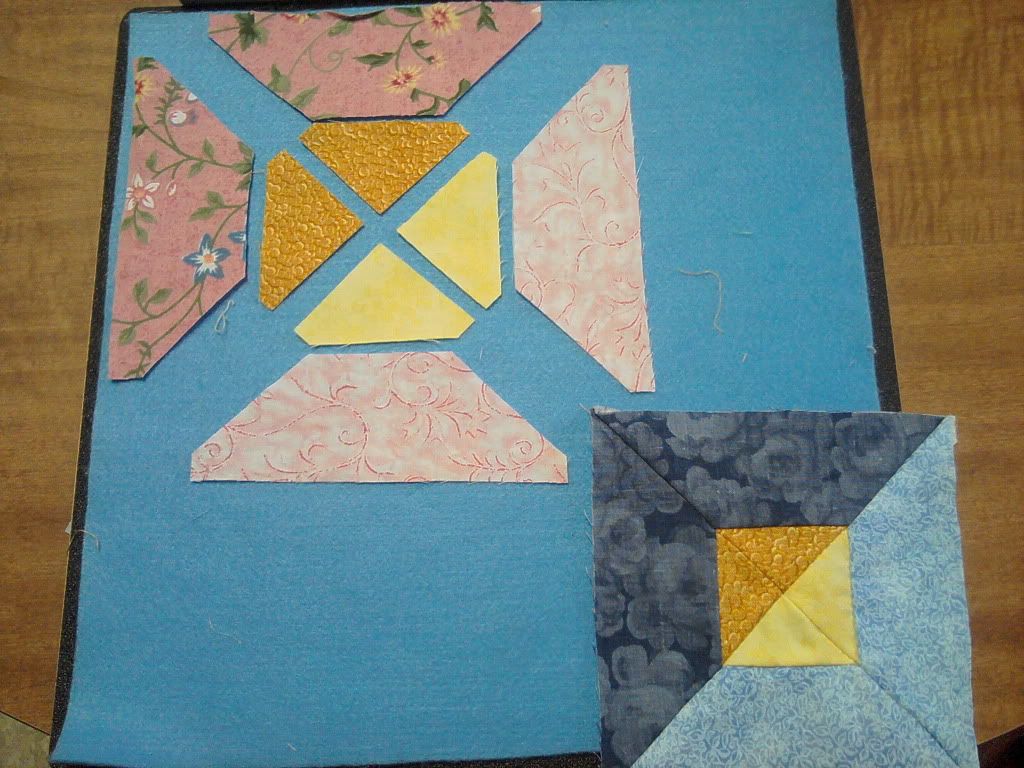 |
| My sandboard has a felt overlay that allows me to place a block into position to quickly sew it together. I usually "stage" one block so that I can pull it out of my Omnigrid Travel Case and sew in odd moments. It may seem silly for a block with only 8 pieces, but your baby quilt had 46 pieces in a 12" block, so I really needed it laid out in order not to lose my place. |
Well that wasn't too bad, was it? Be careful and take your time with the templates, and don't stress over the cut edges of the fabric. Carefully mark match points, and store your pieces so you can sew in odd moments. Unlike "designer" quilting, scrap quilting gives you the freedom to cut as you go -- there's no danger of running out of fabric.
Sew in Love with you,
Momma
Linked Up at Homestead Barn Hop #112


I'm following this series with interest, Bekki. I have tons of scrap fabric that I don't know what to do with!
ReplyDeleteTricia